
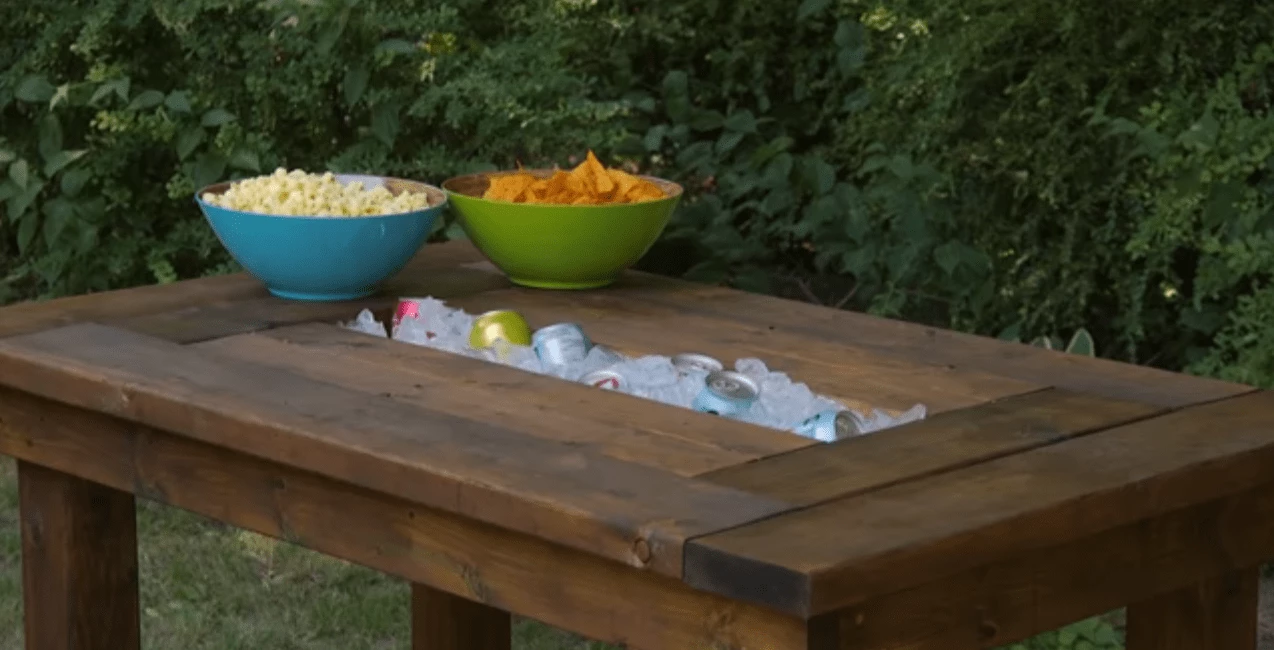
DIY Table Troff Cooler - Summer simplified
You will need: Plastic planter box, 2x6’s and 2x4’s as tabletop, 2x4’s for frame under table, screws for pocket holes, #10 screws, galvanized strapping, water shut off tap, 4x4’s for legs, 3 inch deck screws, silicon, stain of your choice.
Steps:
Measure length of planter box and include lip (removable board will rest on this)
Cut 2x6 to cover the top of the planter box
Cut 4x 2x4’s the exact same length (2 on each side)
Cut 2x 2x6’s the exact size of the width (each end)
Cut 2x 2x6’s the exact size of the length (top and bottom)
Cut 2x 2x6’s the exact size of the with (end pieces)
Sand tops of all boards
Flip all boards over and pocket screw together (DO NOT screw in centre board)
Screw every couple of inches, work from the inside; out.
Build frame for legs using 2x4’s
Screw together frame using pocket screws
Sand and screw into underside of table
Tack planter box onto underside of table
Use galvanized strapping to add support under planterbox
Drill hole and install tap for drainage
Add Silicon to inside so it doesn’t leak
Drill hole in centerboard for easy removal when not using the cooler
Cut 4x4 legs at approx. 27 inches
Install legs with 3 inch deck screws (4 per leg) and countersink to hide screw
Use a plug cutter and flush cut saw to plug holes
Apply stain finish
Add ice, beverages, and enjoy!